VSCode & .NET Integration
Setting up a VSCode project
Next we need to attach a script, but first you need to make sure Godot generates
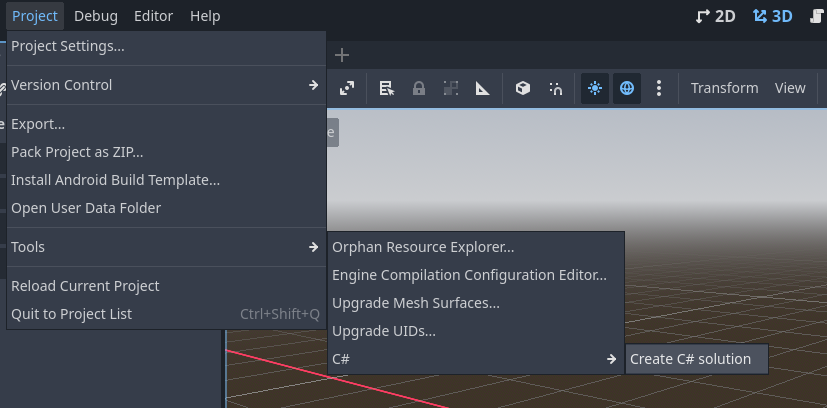
a C# solution for your project. You do this through the menu bar:
Project => Tools => C# => Create C# solution:
Open the C# solution in VSCode.
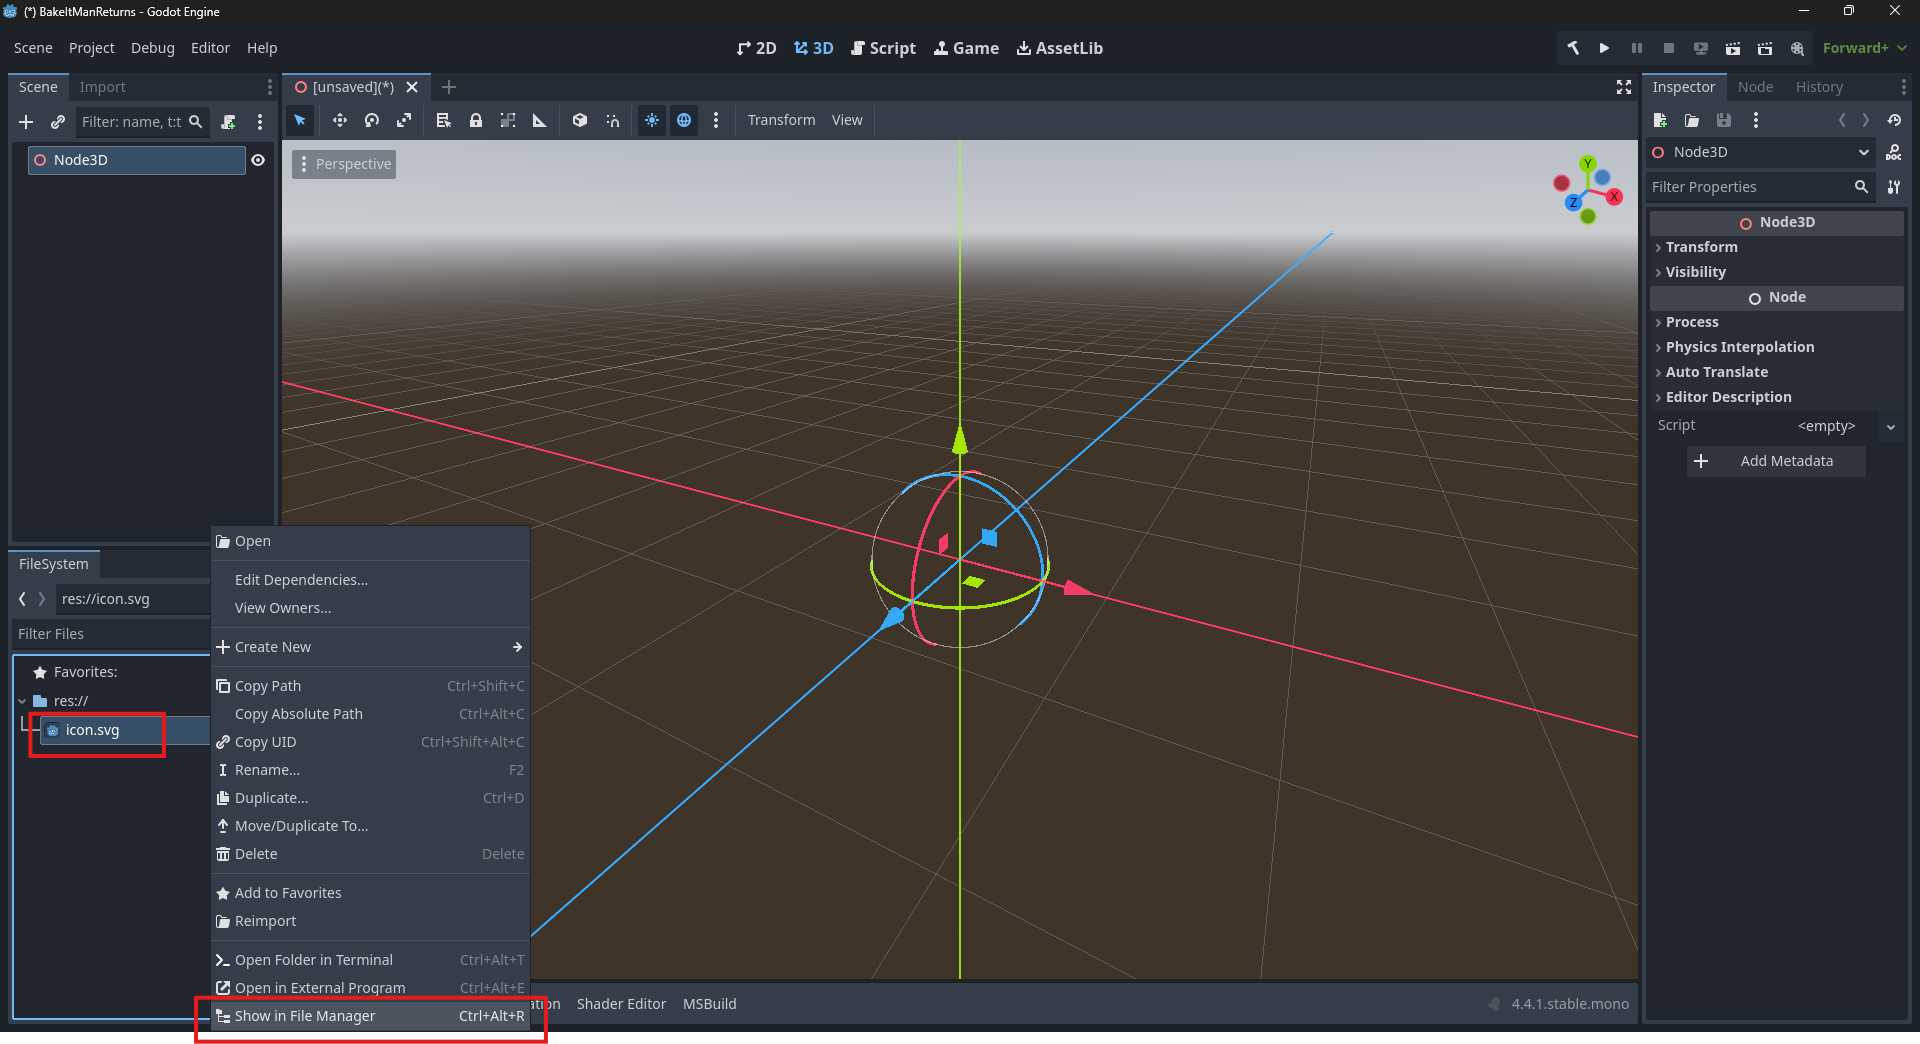
Usually Godot saves the projects inside your documents folder. If you don't remember or can't find where you stored your project, you can use the context menu to open a resource file in the file explorer from the file system section:
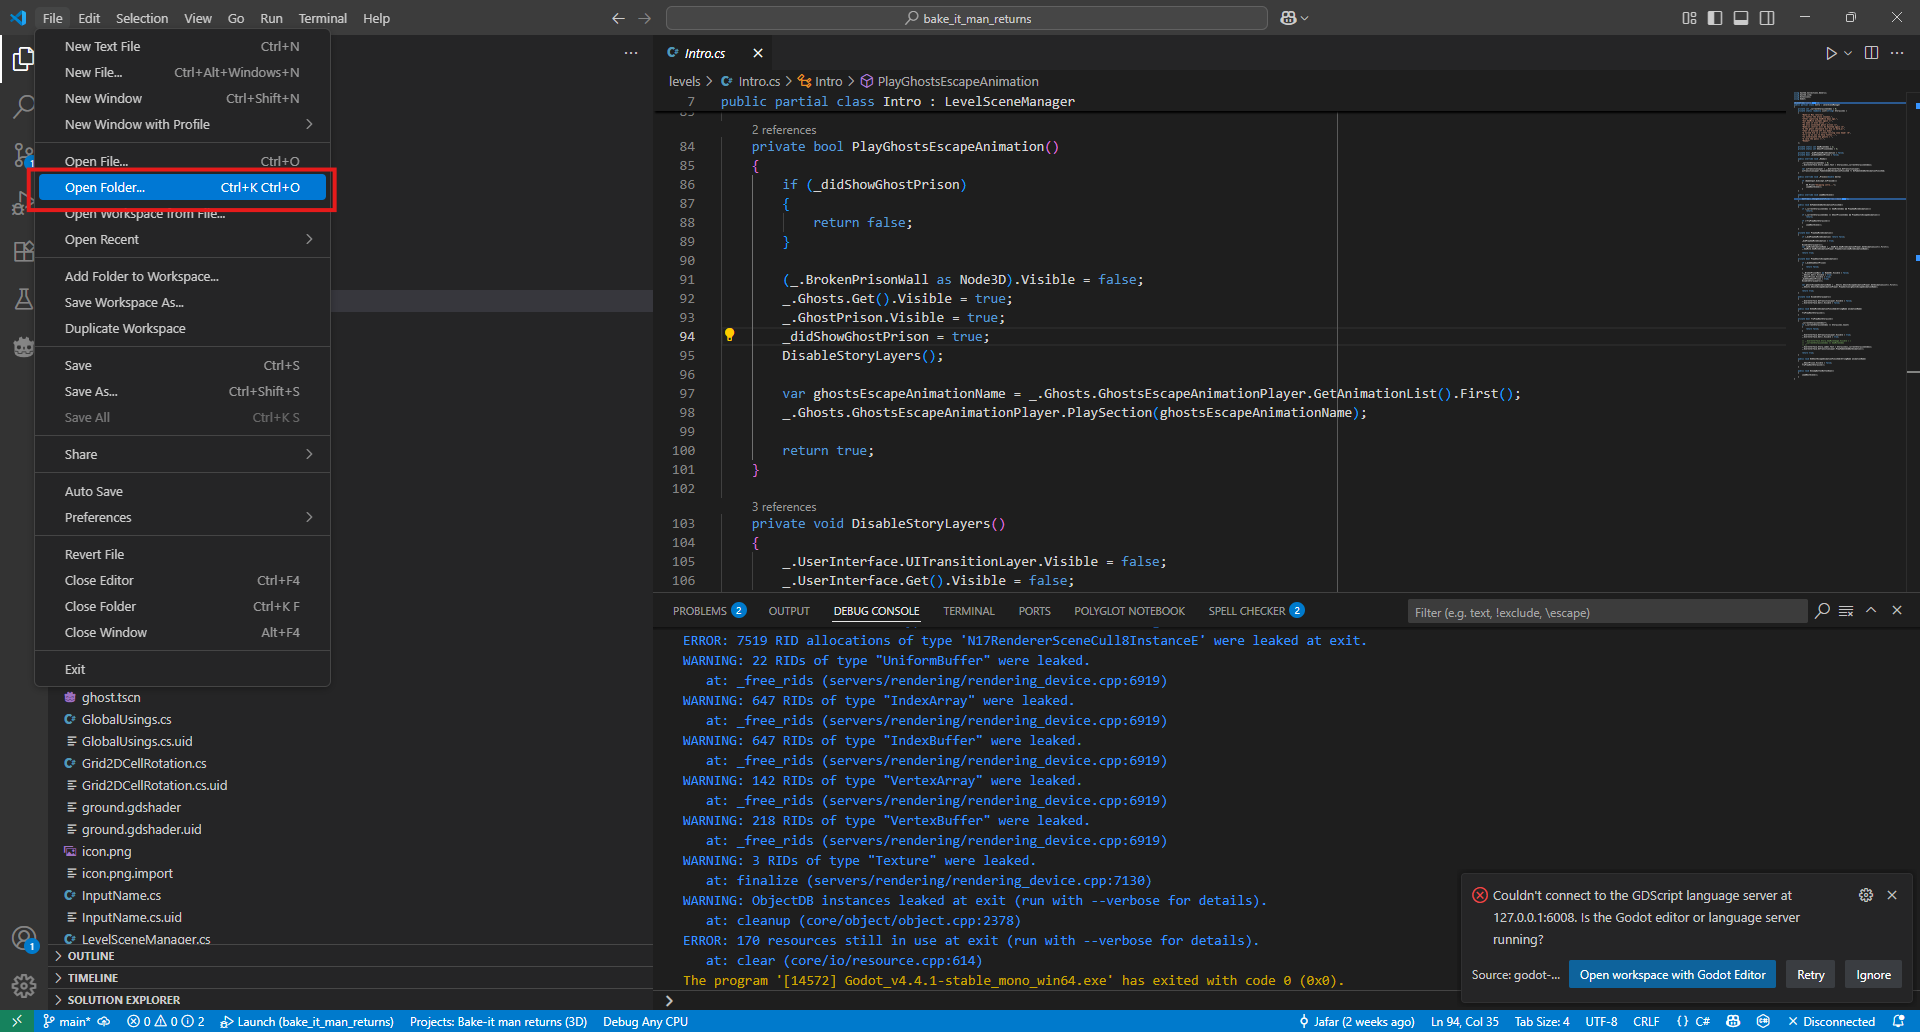
After you figured out where the project folder is, open it in VSCode:
Installing Godot .NET tools
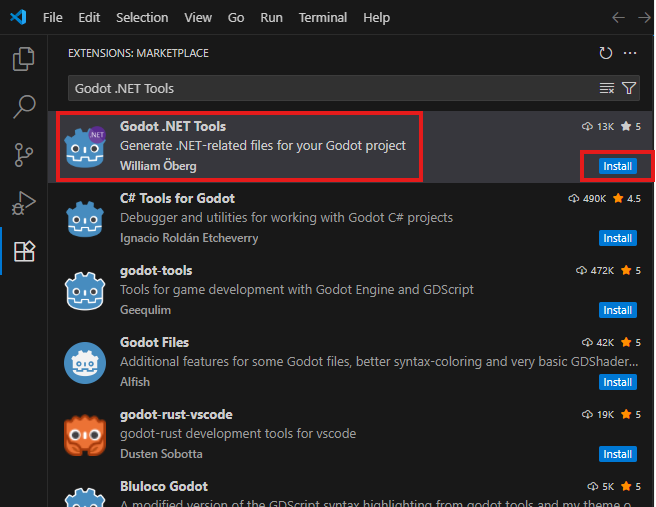
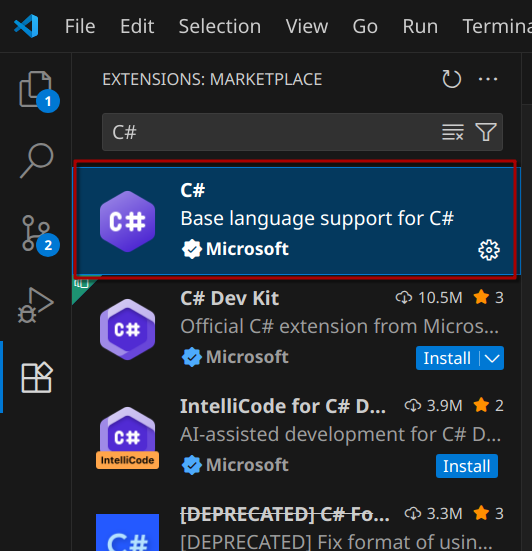
After confirming that you trust the authors (VSCode) or that you want to grant permission for VSCode to open folders (MacOS), you need to install & setup the C# & Godot.NET tools extension so Godot support starts working for Godot projects usings C#.
You can install the from the extension are in VSCode (which usually opens with the hotkey [CTRL]+[SHIFT]+[X] or [CMD]+[SHIFT]+[X] on MacOS):
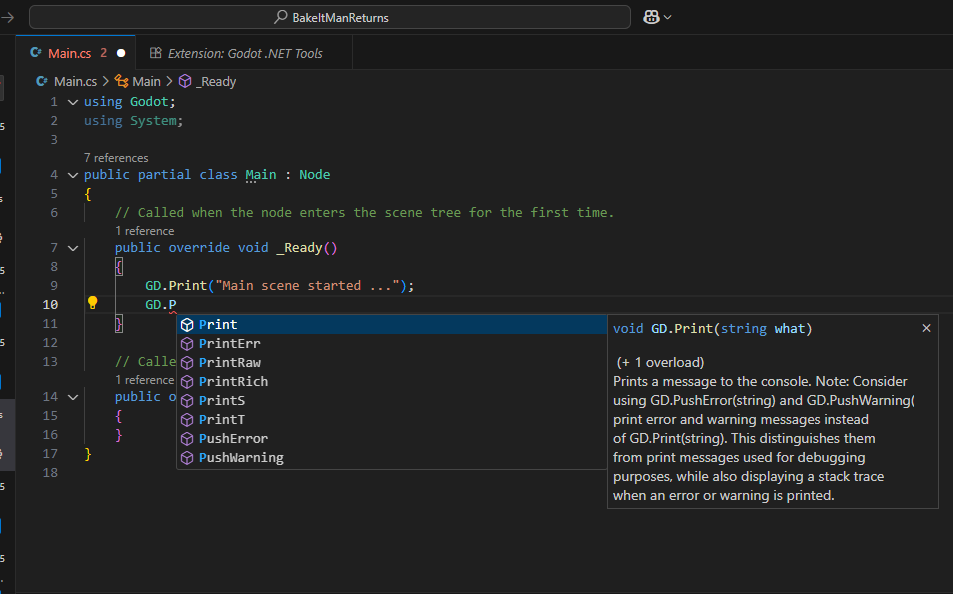
After installing these extensions, when you open Main.cs and try to add
another line in VSCode, you will get suggestions as you type (as well as
explanation after you hit [CTRL]+[SPACE]):
This is not 'AI guessing' — it's proper tooling
If you're coming from JavaScript or Python, you might think: “Hey, I get suggestions there too — must be the same thing.”
Not quite. Those languages are dynamically typed, so AI tools often step in to guess what you might mean. Sometimes it works. Sometimes it’s confident nonsense.
But here in C# — a strongly typed language — suggestions come from real, defined types exposed by Godot's C# API. This is called IntelliSense, and it’s powered by actual metadata from the engine — not a machine-learning guess.
So what you see is guaranteed to exist, not an AI hallucination. GD.Print, for instance, will show up only because it's part of the loaded Godot runtime — not because an AI model "thinks it belongs here."
Configuring the Godot .NET tools
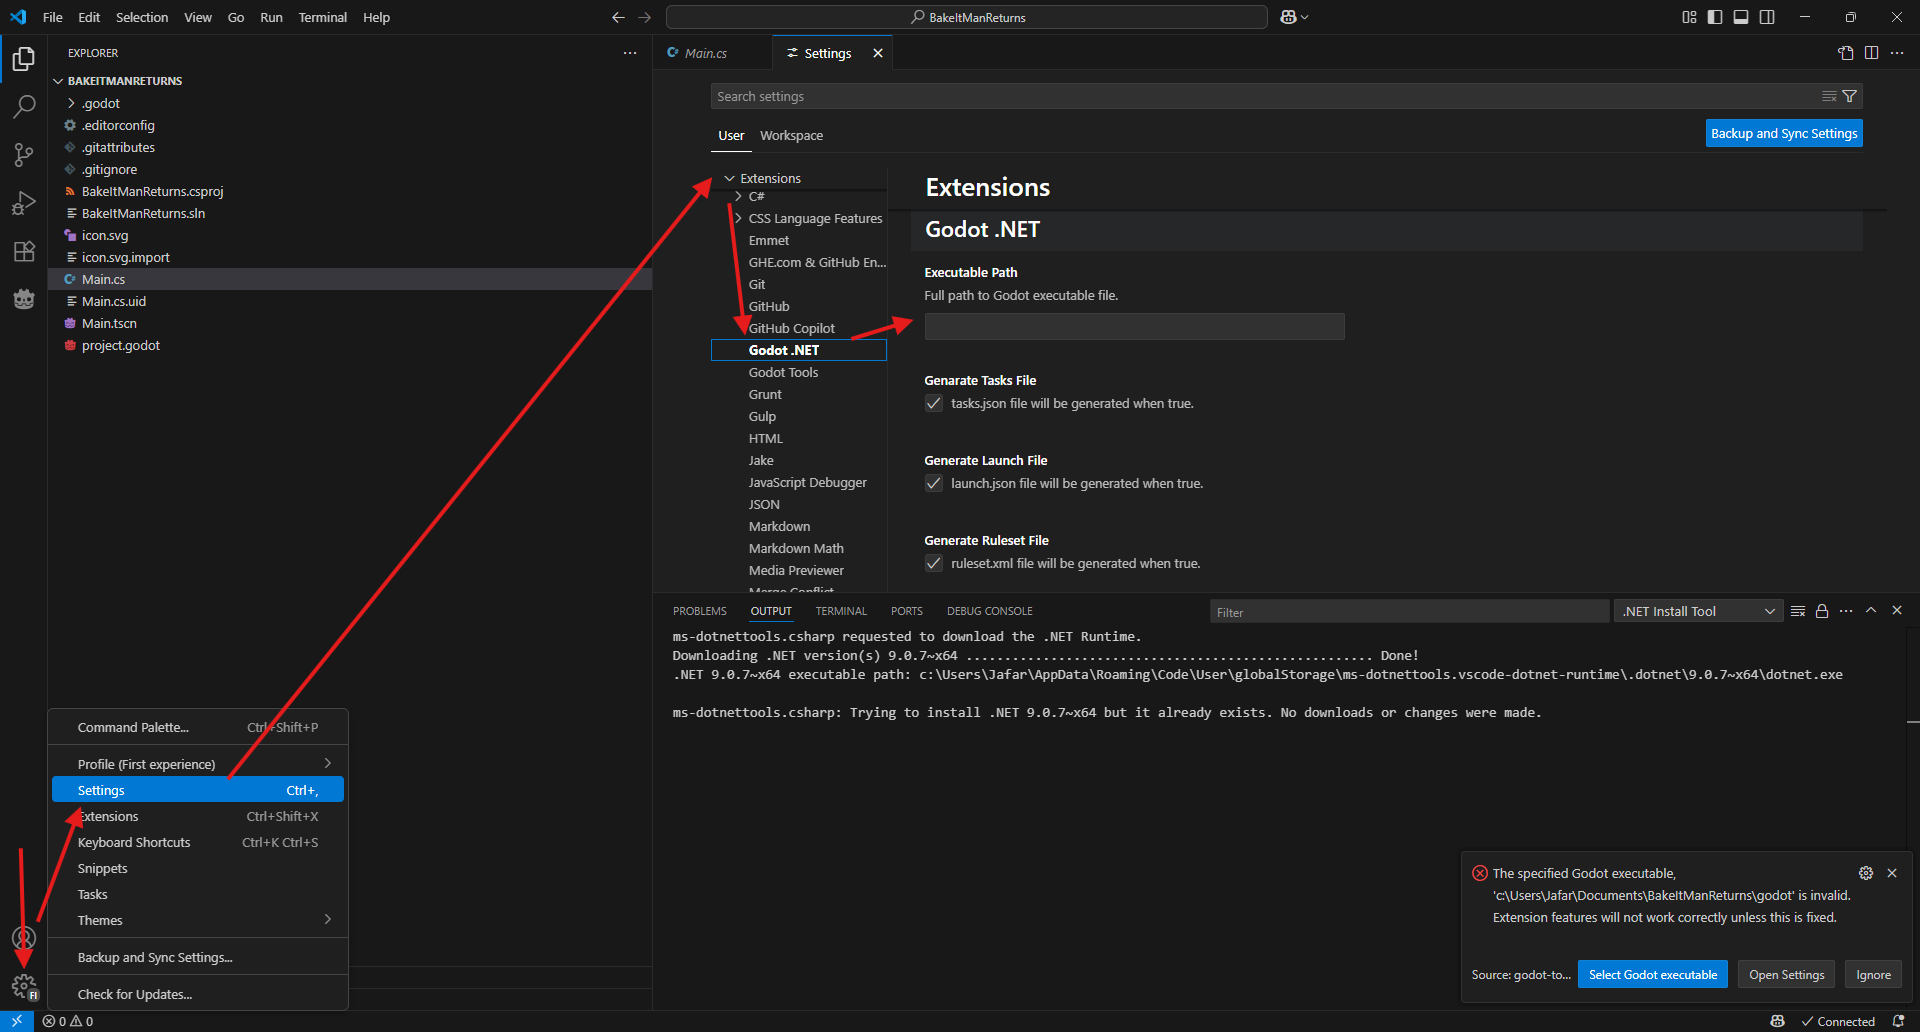
Since Godot is not exactly an app you install it doesn't register itself in the OS registry (like the Windows registry in Windows), so extensions won't know where to look for additional Godot support.
In order to adjust that lookup the path where you installed Godot & put it inside the executable path setting of Godot.NET.
To do that click on the gear icon in VSCode, followed by settings. Then in the window that appears expand the extensions options, click on Godot.NET & fill in the Executable path:
For example if you unzipped Godot in C:\Godot on Windows, the path will be
something like: C:\Godot\Godot_v4.4.1-stable_mono_win64.exe
For macOS, if you moved Godot to the Applications folder, it will be somethting
like: /Applications/Godot_mono.app/Contents/MacOS/Godot
For Linux, if you downloaded Godot in the Downloads folder it will be something
like:
~/Downloads/Godot_v4.4.1-stable_mono_linux_x86_64/Godot_v4.4.1-stable_mono_linux.x86_64
Running project from VSCode
In order to run the project from VSCode using [F5] you need to create a build task as well as a launch task file for VSCode. The build task file tells VSCode how to build a .net executable from your Godot project & the launch task tells VSCode how to open it.
Since that's a one time setup, we're not going to waste too much time on a step
by step basis explanation. Simply create .vscode folder & in the root of your
Godot project folder & make 2 files in it:
- launch.json
- tasks.json
Here is what you need to have inside .vscode/launch.json:
{
  "version": "0.2.0",
  "configurations": [
    {
      "name": "Launch",
      "type": "coreclr",
      "request": "launch",
      "program": "${config:godot-dotnet-tools.executablePath}",
      "preLaunchTask": "build",
      "args": [
        "--path",
        "${workspaceRoot}"
      ],
      "cwd": "${workspaceFolder}",
      "console": "internalConsole",
      "stopAtEntry": false
    },
    {
      "name": "Launch Editor",
      "type": "coreclr",
      "request": "launch",
      "program": "${config:godot-dotnet-tools.executablePath}",
      "preLaunchTask": "build",
      "args": [
        "--path",
        "${workspaceRoot}",
        "--editor"
      ],
      "cwd": "${workspaceFolder}",
      "console": "internalConsole",
      "stopAtEntry": false
    },
    {
      "name": "Attach to Process",
      "type": "coreclr",
      "request": "attach"
    }
  ]
}
And here is the contents for .vscode/tasks.json:
{
    "version": "2.0.0",
    "tasks": [
        {
            "label": "build",
            "command": "dotnet",
            "type": "process",
            "args": [
                "build",
                "-c",
                "Debug",
                "-v",
                "normal",
                "-p:GodotTargetPlatform=windows"
            ],
            "problemMatcher": "$msCompile",
            "presentation": {
                "echo": true,
                "reveal": "silent",
                "focus": false,
                "panel": "shared",
                "showReuseMessage": true,
                "clear": false
            }
        }
    ]
}
After you created these 2 files, when you press [F5], the project will run from
VSCode which is useful when you're working on your code & don't want to waste
time switching to another app.
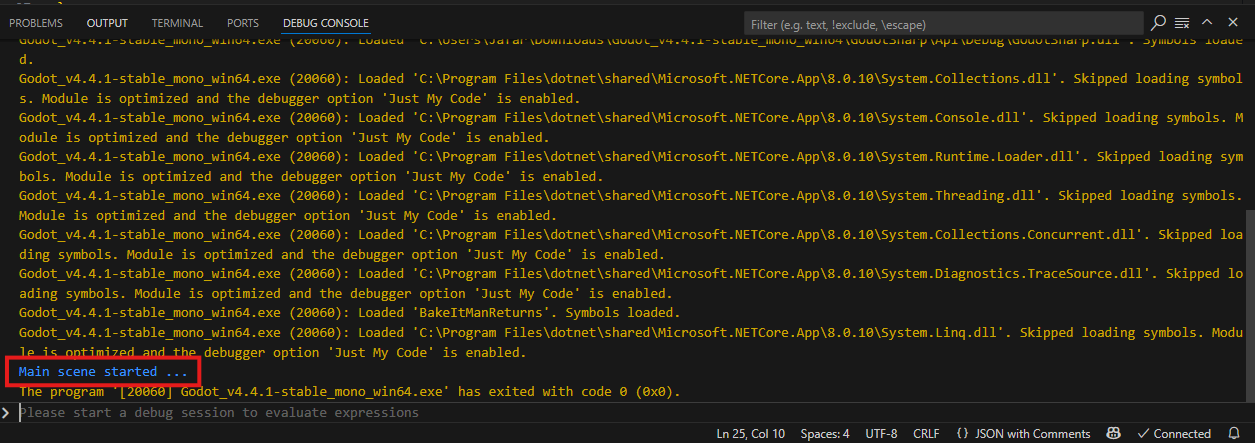
Also when you press [F5], the output you created using GD.Print will be shown
in the Debug Console at the bottom of VSCode:
There is a lot more set up to do, to turn this into a professional project, but it's enough for this part for now.
Feel free to take a break or just continue to the next part if you want!