Intro scene structure & transition
Creating the intro scene will be the most challenging part of this tutorial. Specially if this your first time in game development.
We will try to do things in a step by step basis first however. That means that even though 3d modelling is part of this tutorial, we will skip it for now & focus on the intro text & the transition to the next level first.
Setting up the proper project folder structure
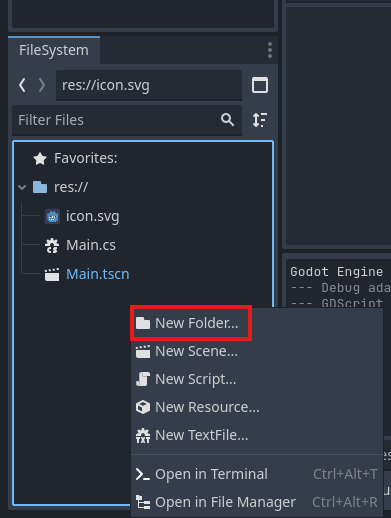
First off header to your file system dock & use the right mouse click to create
a new folder called Levels:
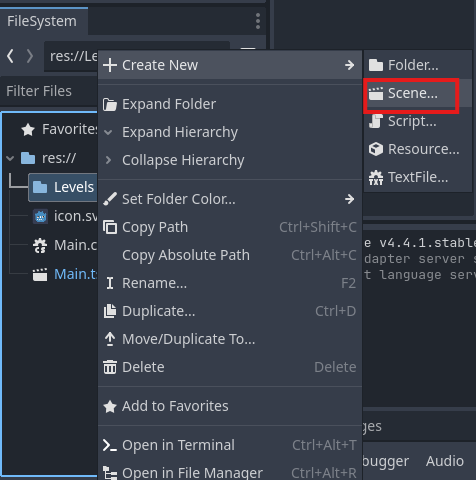
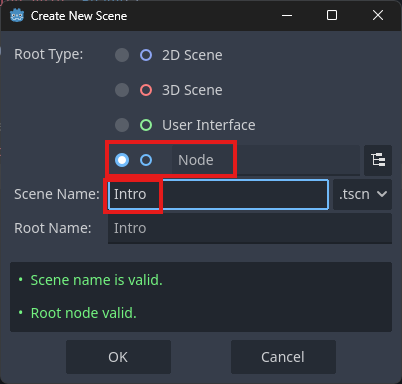
Next, create a Scene called Intro inside the Levels folder with Node as
root type & Intro as root name:
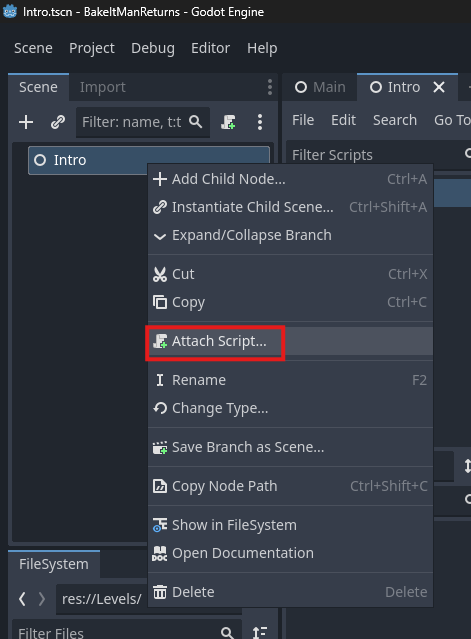
Create initial Intro script
Now right click on the Intro node & click on Attach script.
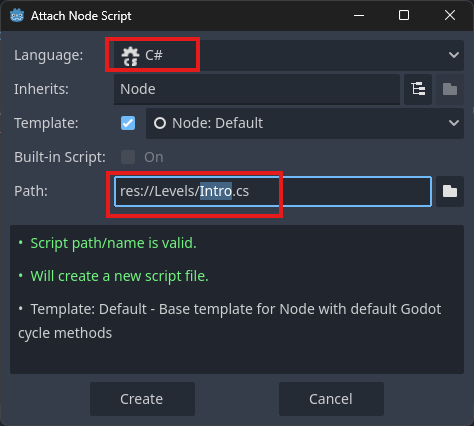
Again, make sure C# is selected as language:
Next, we want to make our Intro scene transition to the 1st level after it
finishes all animations. For now however we want to make sure at least the
transition works. So we need something that tells our Intro scene to open the
1st level first.
Since we don't have a fist level yet however, we're just going to use the Main
scene for that instead.
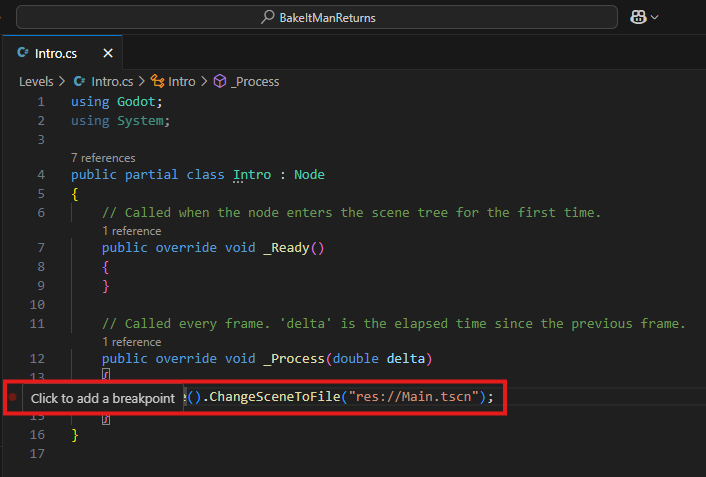
To do that, open Intro.cs in VSCode and add the following line inside the _Process method:
VSCode autocomplete recap
Like explained in previous pages, if you set up things properly, VSCode will give you proper tooling to understand the methods your are using:

These, as also explained before, are not AI guesses, but built in documentations from the Godot engine itself. So what you see is guaranteed to exist, not an AI hallucination.
Set up the start up scene
Right now if you were to run the project from VSCode, the Main scene will start instead of the Intro. So let's fix that first.
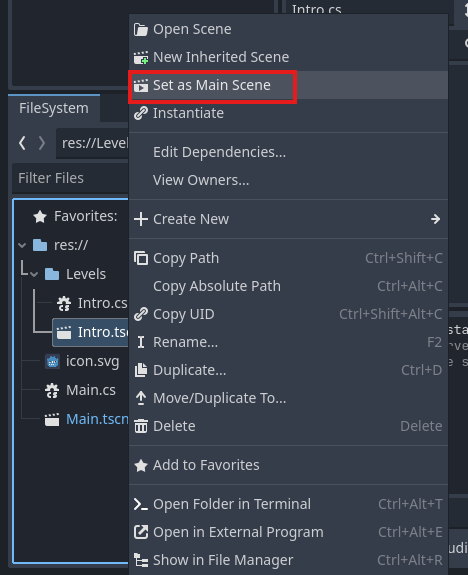
Head to Godot (& click on Reload Scene if necessary), right click on
Intro.tscn in the FileSystem dock & choose Set as Main Scene:
Run project from VSCode
Now you should be able to run the project from within VSCode.
Before you do that however, click next to the line where ChangeToSceneFile is
written:
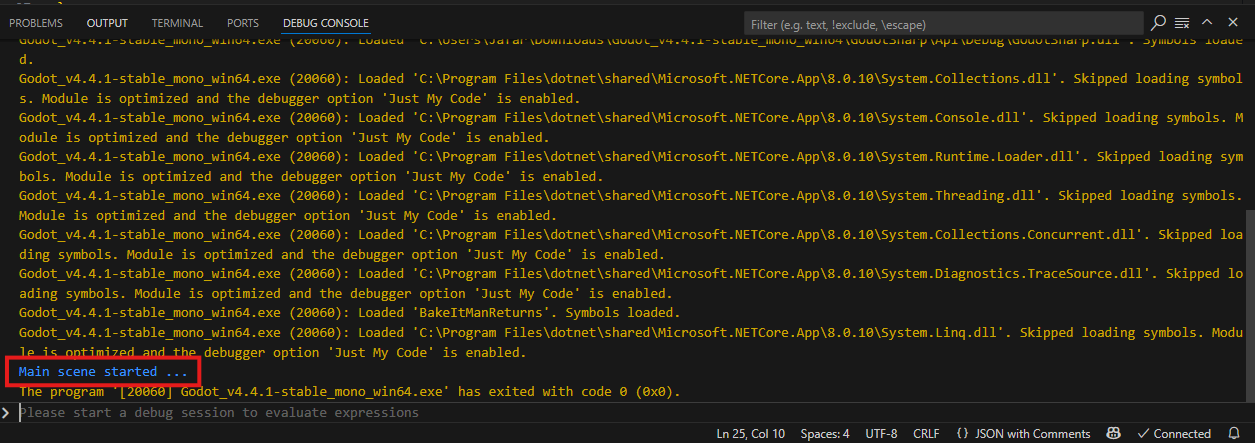
Then press [F5] to run the project.
This will result in VSCode stopping at the breakpoint line:

This step is called debugging and will allow you to figure out what your code is doing step by step.
On the top you also see some buttons to continue running the app, going to the next line of code & some other options.
For now press [F5] in order to continue. This will again, just like the last
time, result in the following output in the VSCode debug console: