Some basic refactors
Intro
Now we got some basic understanding of how Godot works with C#, we can continue doing some minor refactoring to make things a little easier to understand.
One thing that made the code harder to understand was the _Process method.
Godot's naming isn't clear. We needed extra comments to explain what it does.
Relying on comments is not ideal however, especially early on. Their style
varies widely and they lack the structure of method names. This even makes it
tough for AI tools to interpret code consistently.
reminder
A comment is code that is meant as a commentary rather than something that executes.
Since we can't easily change how Godot named things, one other way is to apply what we learned in the previous page about inheritance.
Extracting a base Node class
In order to deal with the method naming, open a C# file in your Godot project. It doesn't matter which file as we'll also going to be using some refactoring options we got from the installed extensions for a smoother experience.
In this page, we'll going to use Main.cs as an example. Update whichever file
you choose with the following lines after the using statements:
public partial class CleanNode : Node
{
    public virtual void OnReady() { }
    public override sealed void _Ready() => OnReady();

    public override sealed void _Process(double timeElapsedSincePrevFrame) =>
        ProcessFrame(timeElapsedSincePrevFrame);

    public virtual void ProcessFrame(double timeElapsedSincePrevFrame) {}
}
public partial class CleanNode : Node
{
    public virtual void OnReady() { }
    public override sealed void _Ready() => OnReady();

    public override sealed void _Process(float timeElapsedSincePrevFrame) =>
        ProcessFrame(timeElapsedSincePrevFrame);

    // Strictly speaking the following should also use a `float` type
    //  (e.g.: `float timeElapsedSincePrevFrame`)
    // C# automatically converts values between floats and doubles however, so
    // you can use a double here to prepare for Godot 4!
    public virtual void ProcessFrame(double timeElapsedSincePrevFrame) {}
}
Don´t worry about the virtual & sealed keywords for now. That comes later.
Also if you need an explanation about the => syntax, its basically a way to
tell C#, hey this method is just a wrapper for a single statement. This is
called method body expressions in C# terms.
Refactoring the node structure
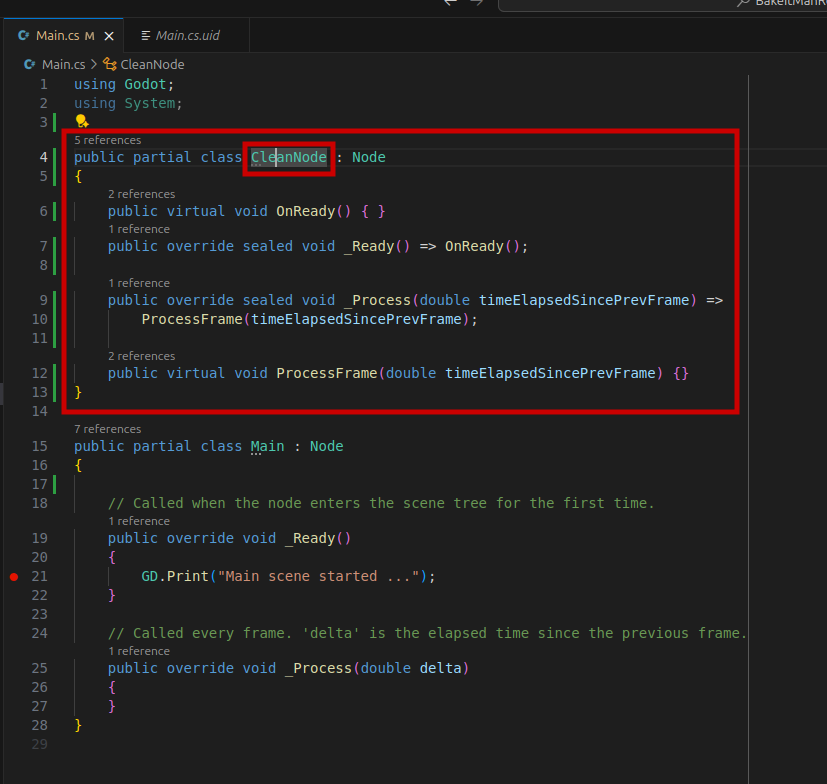
After you updated your code, put cursor somewhere inside the CleanNode text
like this:

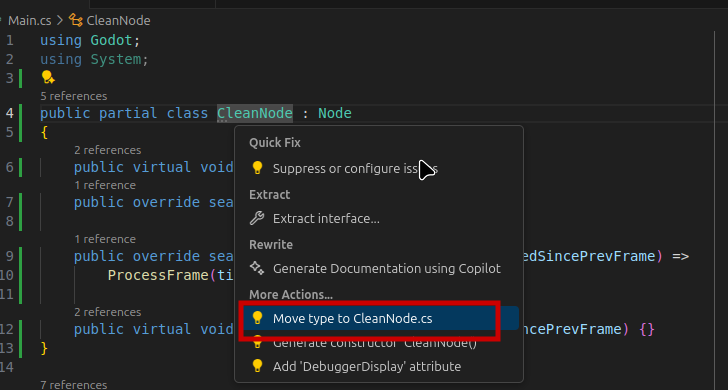
Then click on the light bulb or press [CTRL]+[.] to open an options menu
available for that part of code. From the menu that opens, choose move type to
CleanNode.cs:

Now, before moving on, open both Main.cs and Intro.cs and replace any
instance of Node as the base class with CleanNode.
Main.cs should have line that looks like this:
Intro.cs should have a line that looks like this:
If you did this correctly you should see an error in the VSCode editor right
where _Ready & _Process overridden in Main.cs & Intro.cs. The error
says something like:
That is because of the sealed keyword in the CleanNode class. If you remove
it the error goes away, but that's not what we want. The sealed class was
intentional because we want to force new method names in inherited classes.
What we instead want to do is to use the new methods introduced by the base
class called CleanNode in our case. Instead of overriding _Ready & _Process
inside Main.cs & Intro.cs we need to override OnReady & ProcessFrame.
Also we don't need the extra comments anymore as the new methods are now more
descriptive.
This is how your Main.cs should look like:
using Godot;

public partial class Main : CleanNode
{
    public override void OnReady()
    {
        GD.Print("Main scene started ...");
    }

    public override void ProcessFrame(double timeElapsedSincePrevFrame)
    {
    }
}
Your Intro.cs should look like this:
Commit changes into git
As the last step you can commit your changes into git with a message like:
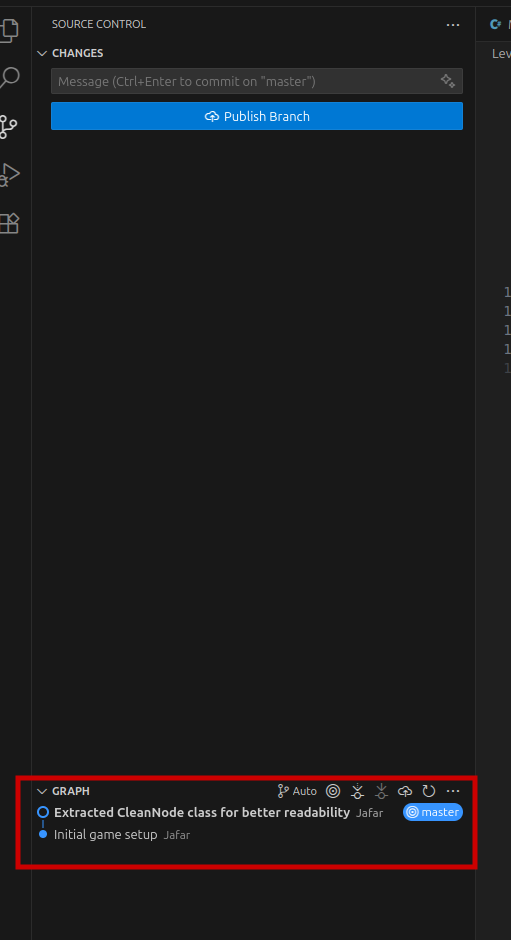
Extracted CleanNode class for better readability
You can do this with the same steps explained in the testing git in VSCode page.
If you did this properly your git graph will update with something like this:

Some notes regarding refactoring
So far this tutorial touched on certain refactors you can do to improve your code. Please note however, that refactoring is a continuos process. For example you may have followed this tutorial and let the Intro scene open the Main scene. The reason behind that is, while working on the game this tutorial is derived from, there was initially only 1 scene. Main may therefore have been a reasonable name at the start. Later an Intro scene was introduced however that needed to come before the gameplay mechanics activated. Since those where in a "Main" scene, the most straightforward update was to open Main from Intro. While this doesn't matter to the players of your game, it could cause confusion when developing, because Main indicates the start of something. You may end up in a similar situation, so its important to continuously review the project structure to set things up in a sensible way.
There is a lot more to cover, but that is enough for this page. In the upcoming pages we're going to do some modelling, apply some additional configuration to further simplify the workflow. After that, we’ll return to the intro scene and continue working toward the final game logic and setup, including some modeling steps along the way.