Some basic 3d modelling
Intro
So far, we’ve mostly dealt with setup and basic code. That will continue,
but now is a good time to switch gears. Staying too long on one topic can
become dull, even if it’s important.
So we're switching to some basic modelling to help keep things fresh and make the learning process more enjoyable.
Don't expect high quality models from the get go
Please note that this tutorial isn't going to give you everything you need to know about Blender, nor is it intended to explain everything from the get go. Rather its built upon the philosophy of small steps just like YouTube channels like "modern software engineering" promote. This is actually not only true for software development but for any kind of experiment. For example if you were to invent a cooking recipe, you would want to test with a small amount first. The consequence is, that if you failed you haven't lost everything in one go. Of course there is more to software than small steps like automated testing, but that's not the topic of this page right now.
Some basic Blender setup
Before we begin make sure you have the right settings set up for your device.
For example you may want to set up specific settings if you're using Blender
with a laptop.
For laptops, under edit => preferences => Input, enable these 2 options if applicable:
- Emulate numpad (useful for laptops without a numpad)
- Emulate 3 mouse button
Both of these options are handy for most laptops. Laptops might not have a numpad for example in order to save space. As for the 3 mouse button emulation, Blender also supports horizontal touchpad gestures. If you have the proper drivers installed, then you will see an option for that as well. Its called "Multi-touch gestures" & appears under a Touchpad section. This option allows you to move an object by simply moving the mouse with 2 fingers.
Creating the main villain
The basic model
After you configured the preferences of Blender the way you want:
- remove the cube (by clicking it and pressing [DELETE])
- add a uv sphere ([SHIFT]+[A] => Mesh => UV sphere)
- select the uv sphere
- Use the search menu ([F3]) to search and apply the "Shade smooth" option
Step 1 is very easy. Just click on the cube and press delete. For other steps you can use the search menu by pressing [F3] and searching for the desired option.
UV-mapping: preparing the model for a texture
We want to put a grin on the face of the villain to make it look like he is up to no good. One way to achieve this is to use a texture. Our villain is not flat however, but spherical, so if you were to assign a texture to it, Blender won't know how to apply it. That is where UV mapping comes to the rescue. This is a process where you map X,Y,Z coordinates of an object to the U,V coordinates of an image. This image is usually called texture. The letters U,V here simply refer to the X,Y coordinates in the image & are just a shortcut to directly refer to image coordinates.
In order to create a UV map:
- Select the sphere
- Enter Edit mode ([Tab])
-
By default Blender will select all vertices*
* Vertex & other select modes
Blender has 3 selection modes when an object is in edit mode. This is quite different from tools like Sketchup which don't have an edit mode at all. The benefit of this is, that you have more fine grained control how the shape is built allowing you to reduce its complexity for better performance. There are also other reason behind it, like Blender not just being a more general purpose 3d tool doing more than just simple models. For example it also allows animating an object where these details matter a lot. There are 3 select modes while in edit mode:
- Vertex select, which allow you to select the 3d points
- Edge select, which allows you to select lines
- Face select mode, which allows to select faces All these modes have a corresponding icon in the menu left corner of the menu bar while in edit mode:

You can get a description of each of these modes by hovering the mouse over them.
-
Put the viewport to front view ([1] on the numpad)
-
Deselect all vertices ([ALT]+[A]) & zoom in* until the sphere takes almost all of the screen
Zooming in prevents selection mismatches here
There are multiple ways to select exactly the front half of the sphere like also using the left [3] and right ([CTRL]+[3]) view & holding shift to extend the selection. The easiest way however is to just zoom in as much as possible so Blender doesn't skip any area for selection.
Toggling to local view to zoom
Blender has also a mode called local view which hides all objects except the one you're editing. Once activated, it also zooms in towards the object being edited. If you're using the version recommended by this tutorial, then you can turn it on/off using the
/character. -
Instead of all vertices, use the mouse to select the visible ones
- Its possible not all the vertices are selected, so also use Right & Left view ([3] & [CTRL]+[3]) to select the remaining parts
- Unwrap using project from view (bounds) (using [U] followed by project from view (bounds))
-
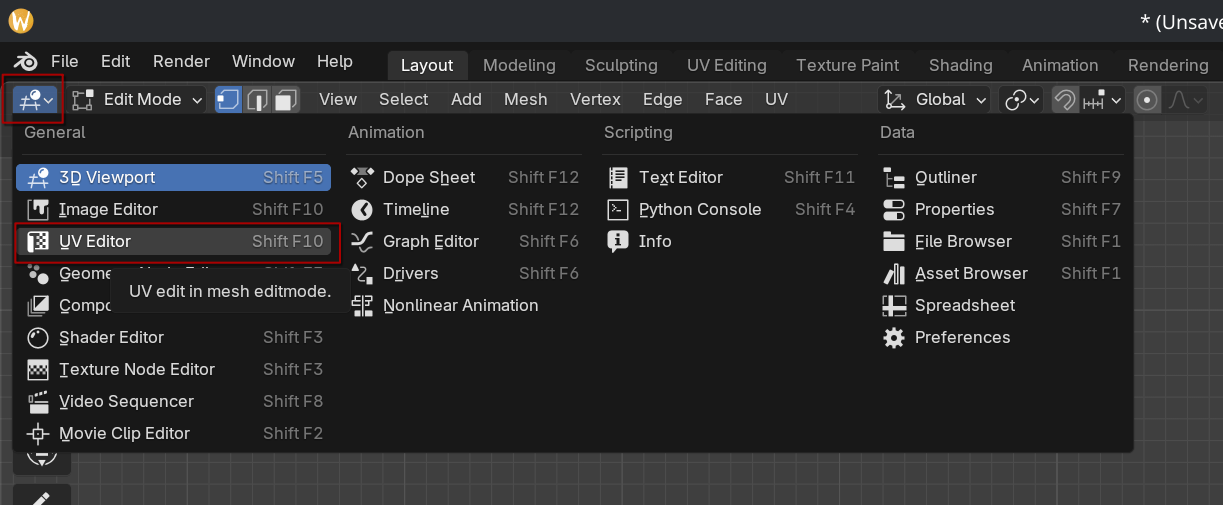
Switch the editor type to UV editor using [SHIFT]+[F10] twice or the menu bar:
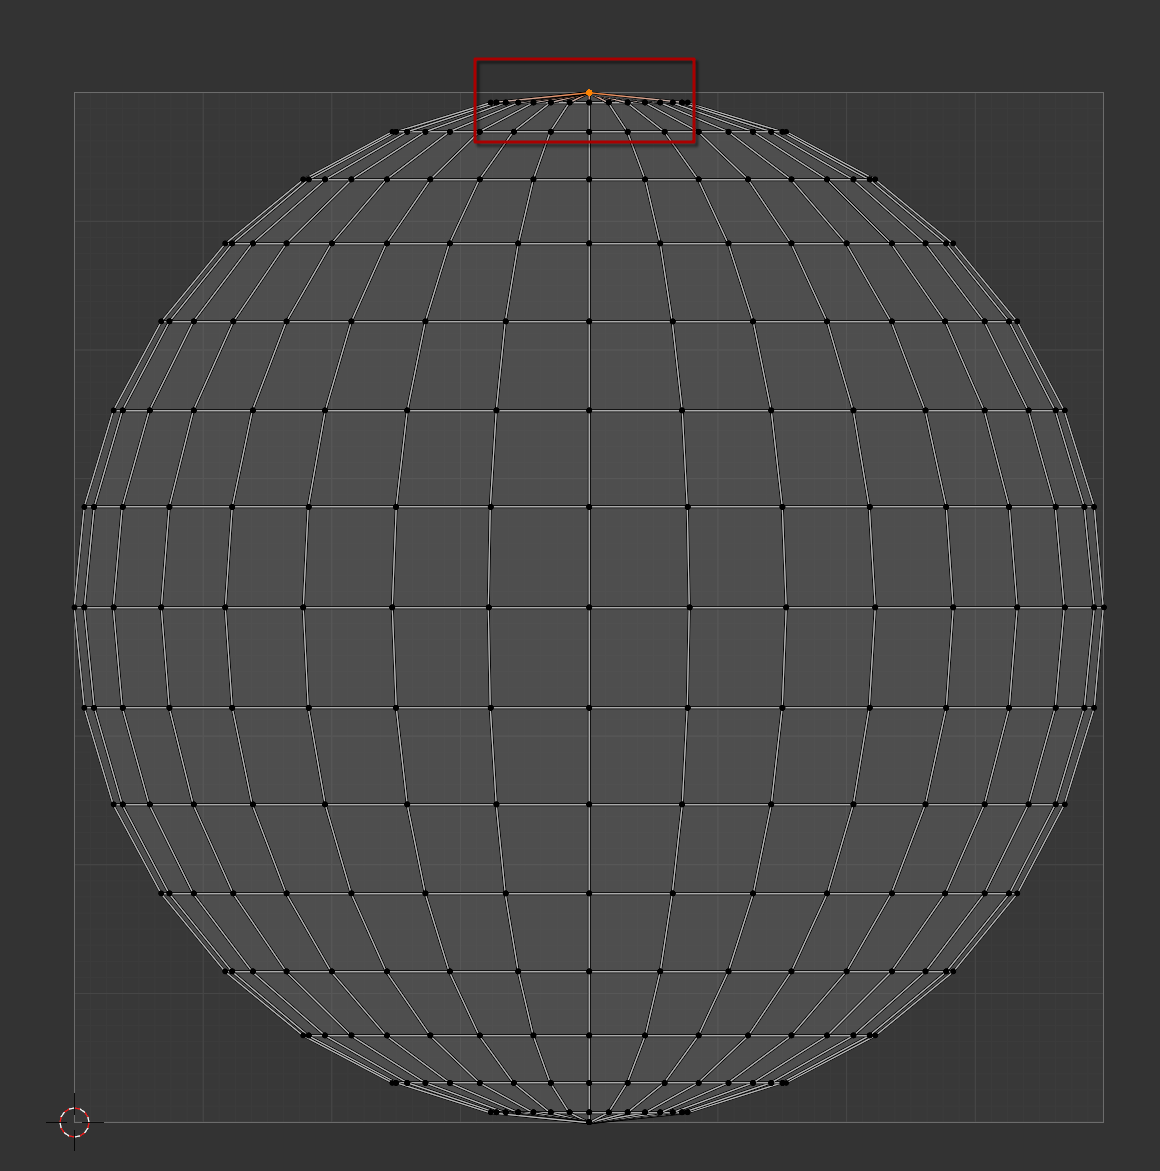
Right now, the selected area takes all of the space, which isn't what we want. That is because the other area isn't yet mapped properly, so it will interfere with our mapping and make a mess when applying a texture. In order to solve this we need to downscale the UV map.
-
Select the top center vertex
-
Move the cursor to selection ([SHIFT]+[S], [2])
-
Change the pivot to 2D cursor (to influence how the uv is scaled):

-
Select all vertices ([A])
- Scale the selection down by half ([S], [.5])
- Switch the editor type back to 3D viewport ([SHIFT]+[F5])
- Deselect everything ([ALT]+[A])
- Put the viewport to back view ([CTRL]+[1] on the numpad)
- Repeat step 6 until 8
- For step 9, select bottom center instead
- Repeat steps 10 until 13 again
- Switch the editor type back to 3D viewport ([SHIFT]+[F5]
- Select everything this time ([A])
-
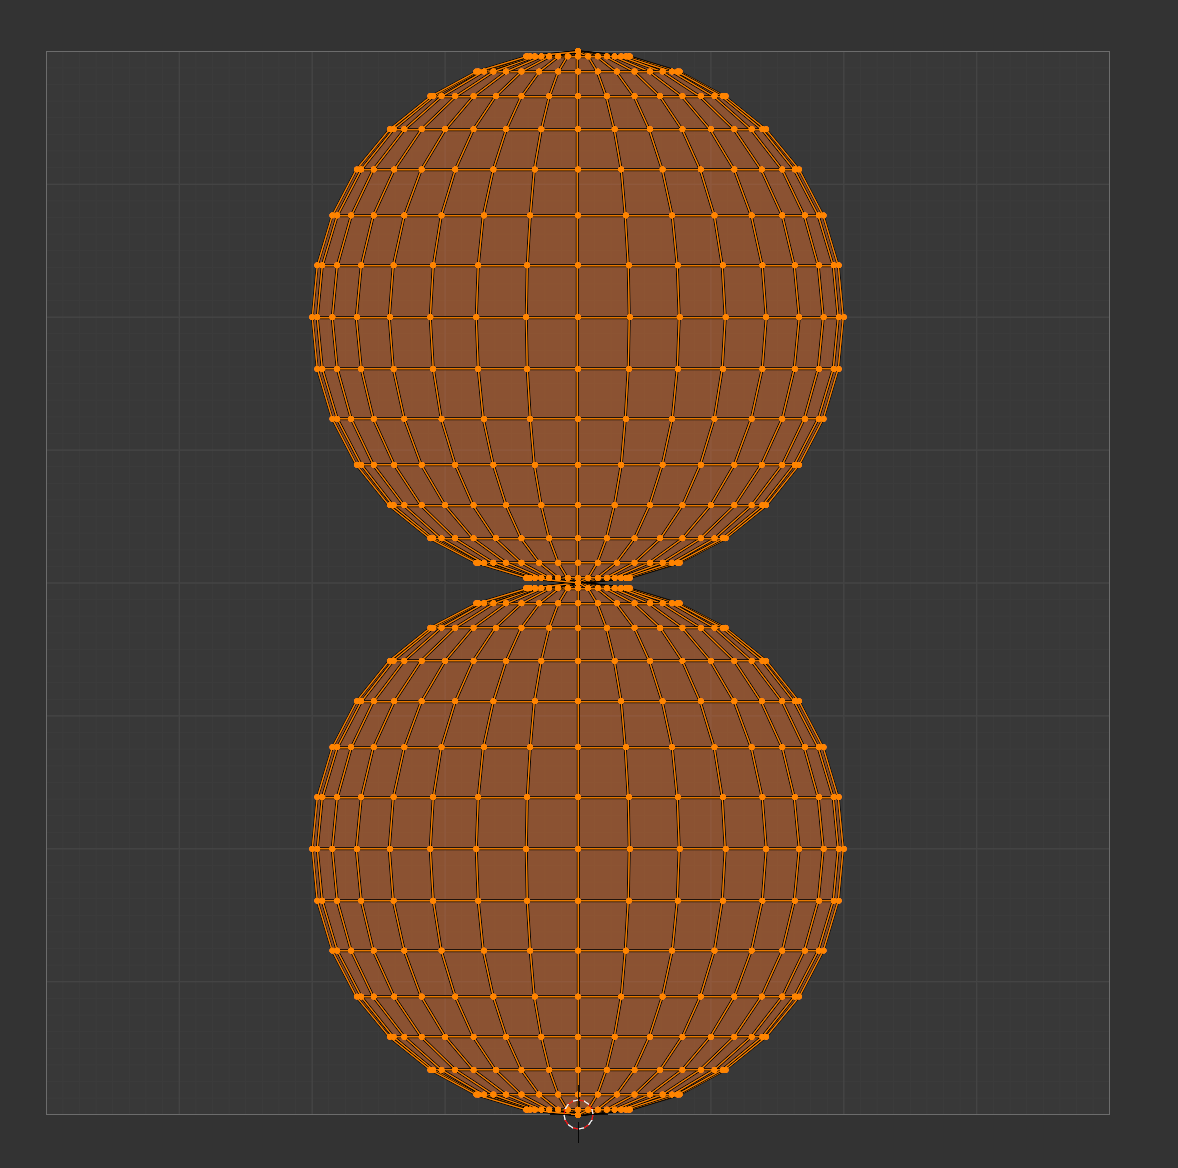
Go back to the UV editor again & check if you have something similar to this:
-
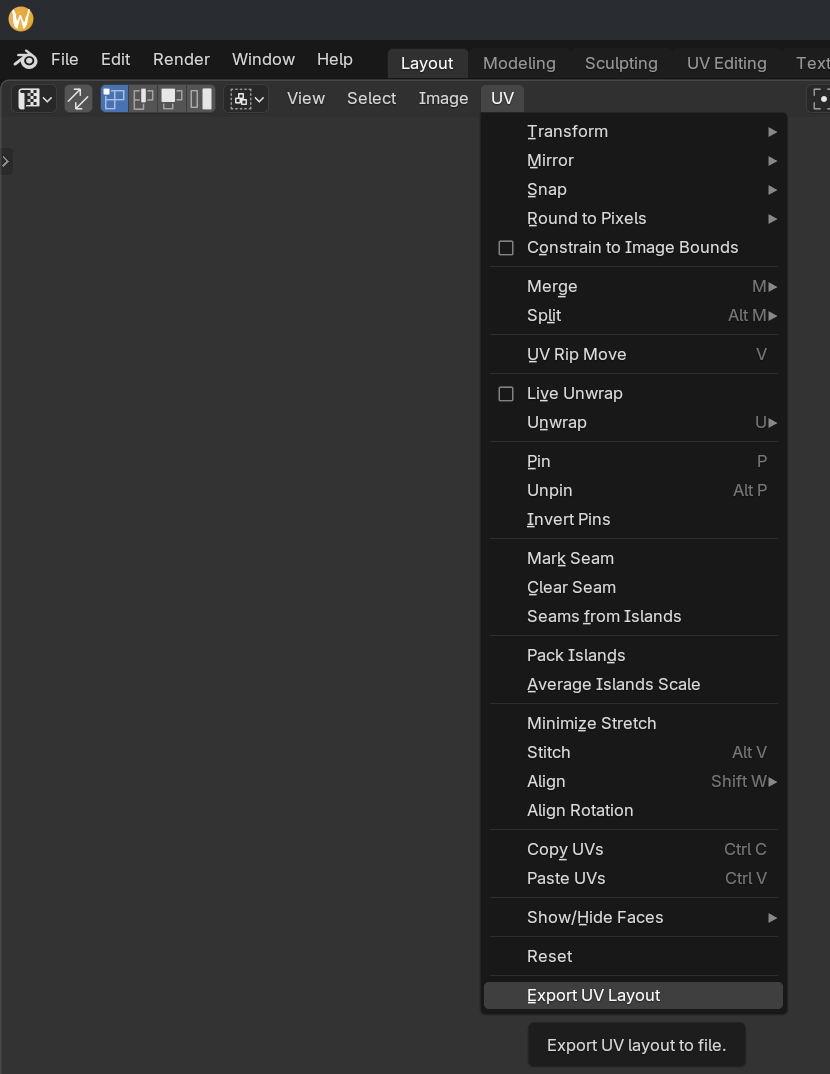
Export the UV as something like MainVillainUVLayout.png inside the
[YourGameFolder]/Art/Charactersfolder:
Creating the texture
Now you have got a UV layout which lays out where you need to draw your texture, its time to prepare the texture itself.
If you're already familiar with either Gimp or photoshop, then just follow the steps below:
- Open the UV layout in an image editing tool like Gimp or PhotoShop
- Use a new layer to draw a face over the top part of the UV layout
- Export/save the UV layout into a png file from your image editing tool
If you're not familiar with either Gimp or PhotoShop, then follow these steps using Gimp:
- Download Gimp
-
Use the bottom right tools to create a new layer:
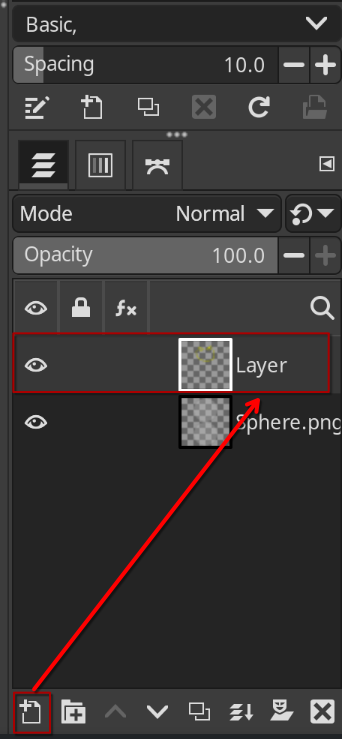
-
Change the foreground color to something other than black:
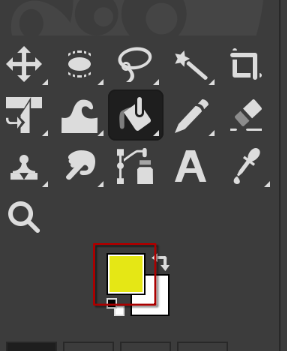
-
Use the pencil tool to draw a face on top of the top circle
-
Click the eye icon in the UV layer to make it invisible:
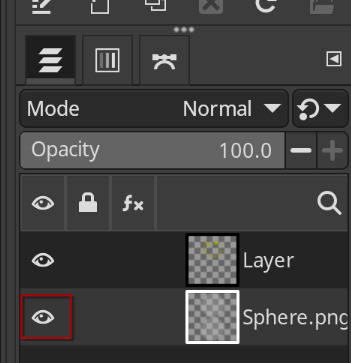
-
Save the file as something like MainVillain.xcf to keep a track of layer structure
- Export the file (using [CTRL]+[E] or [File]=>[Export]) inside
[YourGameFolder]/Art/Charactersas something likeMainVillain.png.
You should end up with an image containing a face on the top and an empty area on the bottom.
Don't worry now if what you made isn't perfect or looks like a kid's drawing. We're going to improve on this later.
Applying the texture
With the image prepared, lets go back to Blender to apply it.
- Go back to Blender & open the image in the UV editor (while the object is still being in edit mode)
- Go back to the 3D viewport ([SHIFT]+[F5])
-
In the properties section on the bottom left, open material properties:
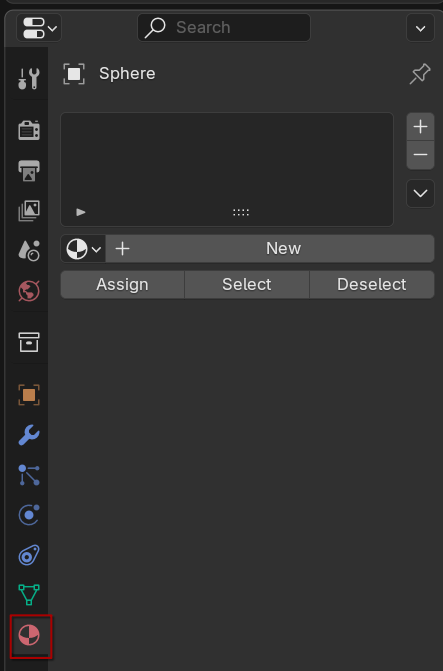
-
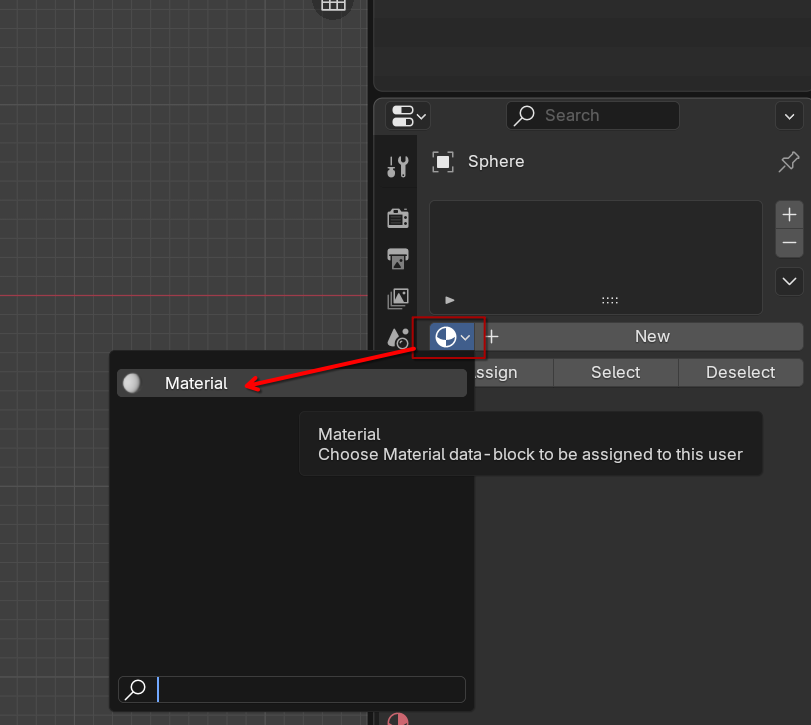
Click on the black and white ball to select the default material Blender created:
-
Link an image node using the yellow circle:
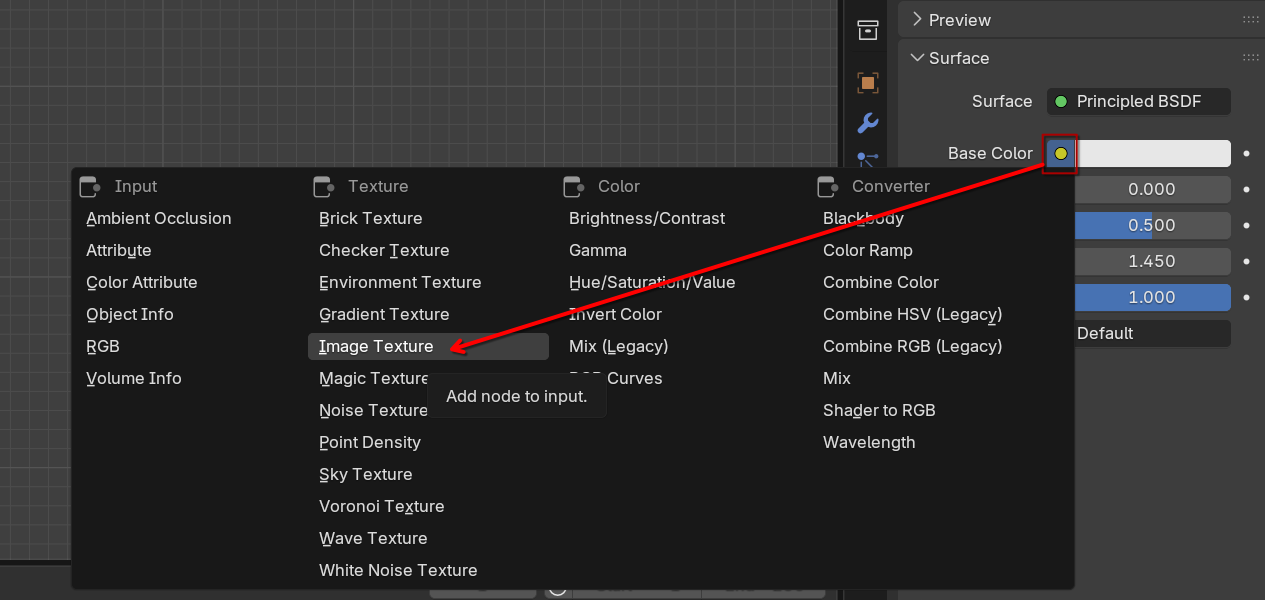
Oddly enough this won't let you select an image directly, so you need to use a separate button to assign the actual image.
-
Use the image icon to assign the texture with the grin you created:
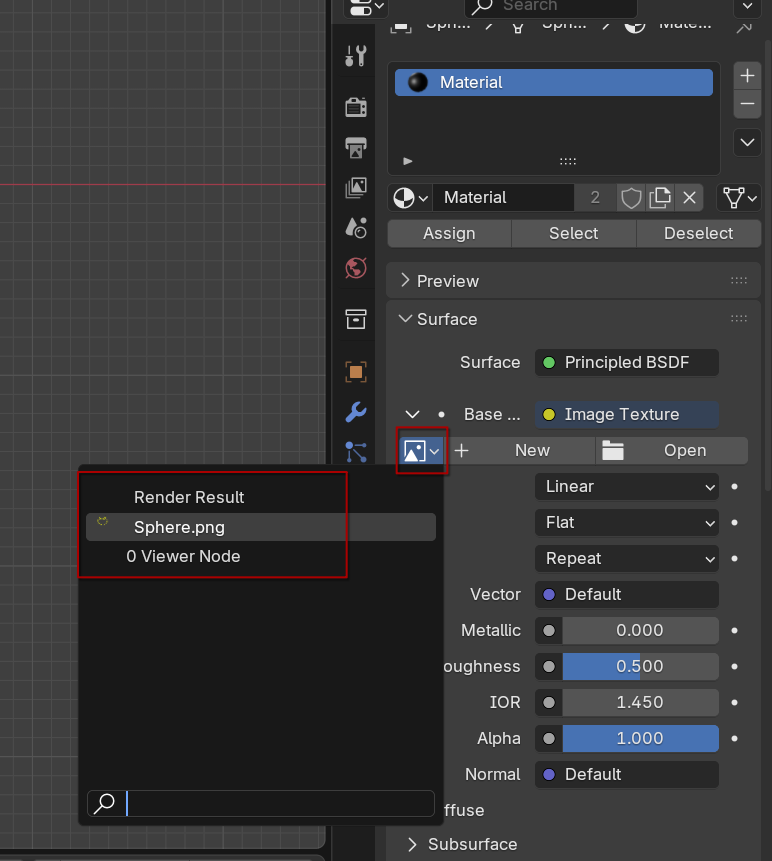
This won't be directly be visible in Blender because Blender uses different shader modes:

By default this is set to solid mode, which doesn't do anything with colors or textures.
-
Change the viewport shading to
material previewusing [Z]+[2] or the black & white ball at the right side of the sub menu:
-
Exit edit mode ([TAB]) to get rid of the edit areas on your model, so you get a better view of how your villain looks like.
-
Save the Blender model as something like
MainVillain.blenderinside the[YourGameFolder]/Art/Charactersfolder.
If you're using Godot 4, it might ask you for the Blender location and will automatically import the 3D model into your game's resources.
We're not done yet with the model however as we still need some fine tuning to do before we can use it in Godot, but that's enough for this page.
In the upcoming pages we're going to continue with some fine tuning to our model, apply some additional configuration as well as some basic work to the intro scene. After that, we’ll return to the intro scene and continue working toward the final game logic and setup, including some more modeling steps if along the way.
More pages coming soon. This tutorial is a work in progress as I build and document each part. Expect topics like gameplay logic, 3D modeling basics, and programming best practices (that are useful even outside of game development).
This is a work in progress
I still need to write the upcoming pages, so be patient with me and come back on a regular basis to see if pages parts are there yet.