Some fine tuning
Intro
If you followed the steps in the previous page, you may have gotten your initial 3d model for the main villain, however there are some minor problems:
- The pivot point of the model is in the center of the sphere which isn't what we want.
- An extra light the camera show up together with the model
- The texture might not look very professional
Fixing the pivot point
In order to fix the pivot point:
- Open the 3d model in Blender
- Deselect all objects ([ALT]+[A])
- Select your villain model
- Enter edit mode ([TAB]) if you're still in object mode
- Select all vertices ([A])
- Go to front view ([1])
- Use [G] to enter move mode
- Use [Z] to restrict movement to the Z axis
- Move the model up until its just right above the helper grid
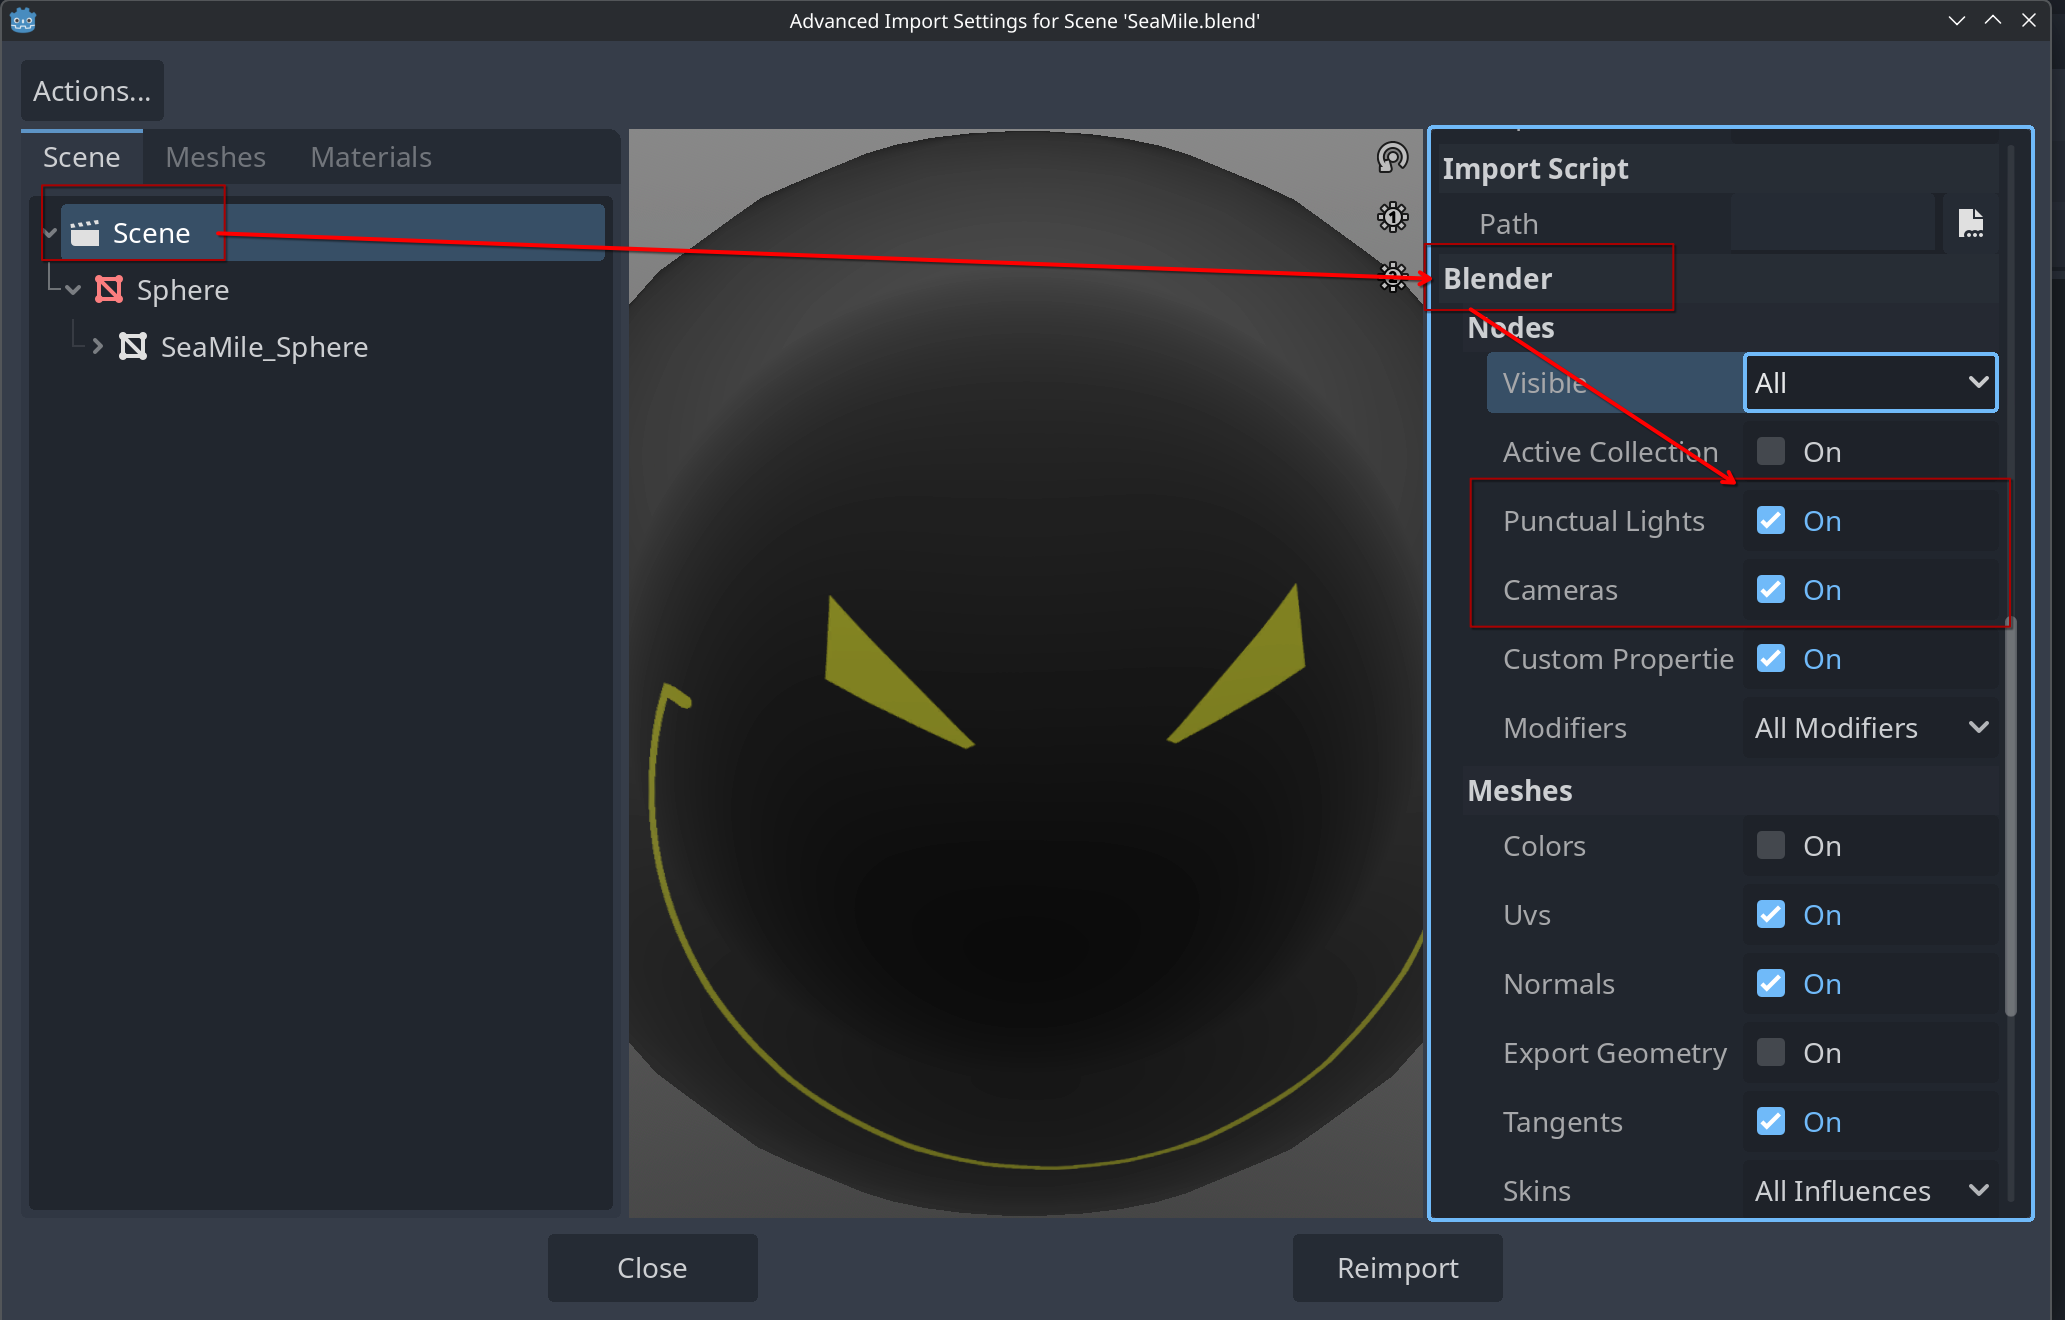
Disabling Blender's light and camera in Godot
Next thing we need to setup is the light and camera so they don't show up together in the game with our villain. For some reason these 2 items also don't mix well together in Godot's import preview. If you want you can also simply delete those in Blender, but then you can't re-use those in Blender. For example you may want to make pictures using the camera with a specific light setup.
In order to disable the light and camera on your villain:
- double click on your villain model in the FileSystem dock inside Godot
- Then go to Scene => Blender => Nodes & turn off
Punctual lights&Cameras:

Improving the texture
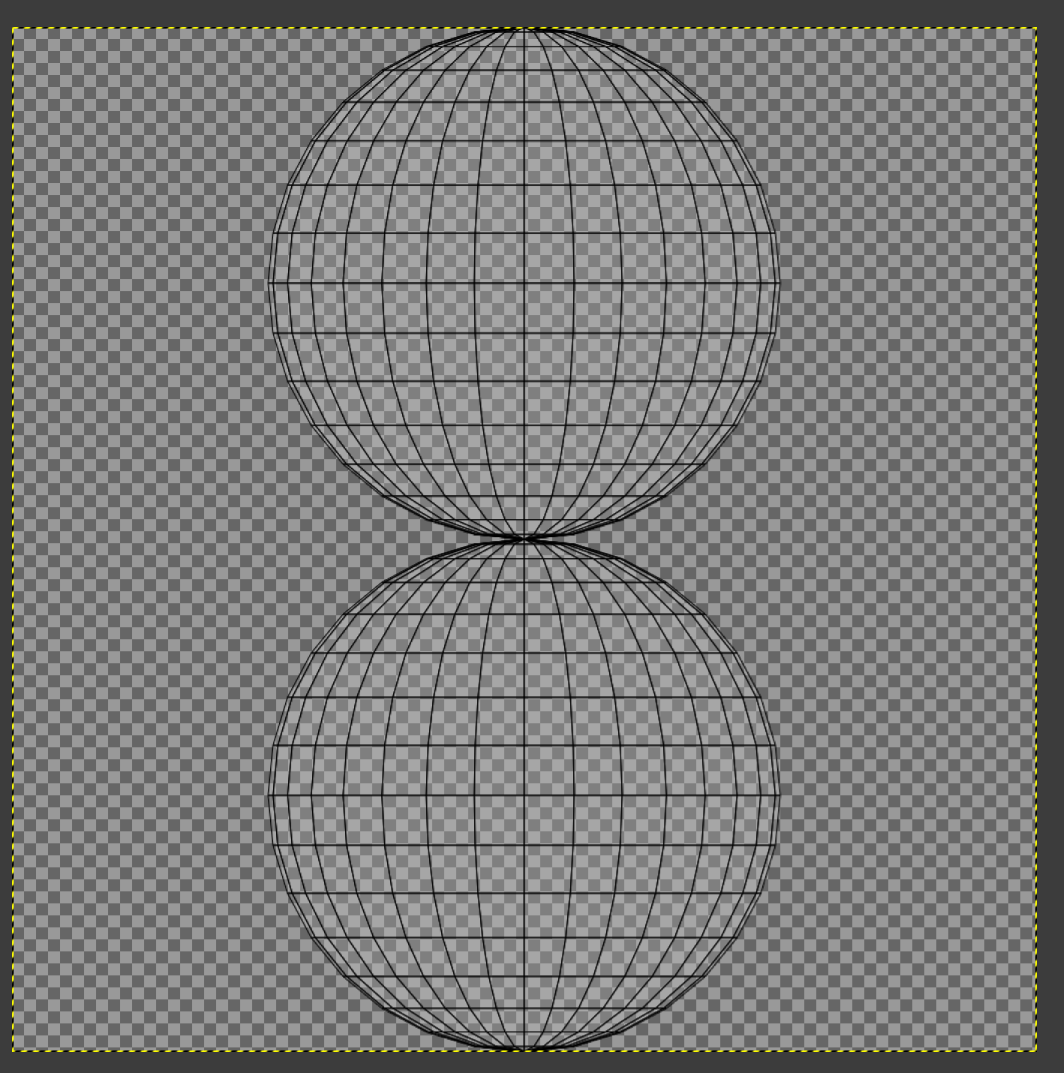
The steps in the previous page were set up to get a one by one match between your model and the UV layout. While this works as a general solution for any shape, its not the most effective in our case. We already know that our villain is a symmetrical sphere so we can start with just one side and use mirroring tools to make it symmetrical.
-
Re-open MainVillain.xcf & delete or hide all layers except for the uv layout. You should get something like this:

-
Follow the video below to below for the remaining steps:
To be continued!
This is a work in progress
I still need to write the upcoming pages as well as updating this page (as it was unintentionally included before being done when trying to fix some minor errors), so be patient with me and come back on a regular basis to see if pages parts are there yet.